Building Groups
You can access the “Building Groups” icon from within a selected building on the navigation bar. You have to select a building in order for the “Building Groups” icon to be available on the navigation bar.
Adding & Removing Users in Groups
Watch the video on “Editing Groups” here.
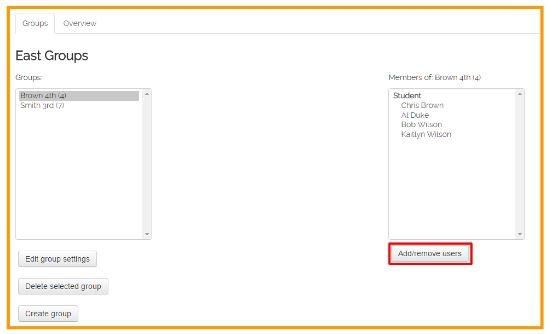
- Highlight the name of the group you want to add or remove users
- Click the “Add/remove users” button.
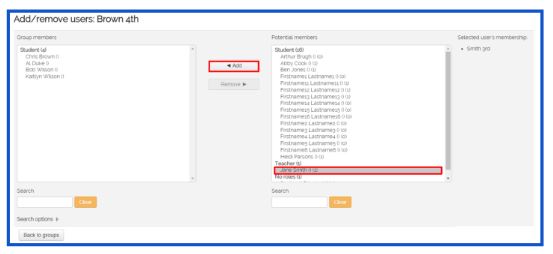
- Highlight the name(s) of user(s) in the right column that you would like to Add to the Class, OR highlight the name(s) of user(s) in the left column that you would like to Remove from the Class.
- Click the “Add” button to add the user(s) into the Class, OR click the “Remove” button to remove the user(s) from the Class.
- Once you have added or removed the students click the “Back to groups” button.
NOTE: if you get confused as to what group/class that you are adding to or removing from, look for the label above the left column, where it says Add/remove users [GROUP NAME]. This will help remind you what group you’re currently working in.